Showing posts with label Quilt As You Go. Show all posts

Sunday, January 19, 2014

More Practice

I've been practicing new fills.  This is a swirl and feather inspired by  Judi Madsen.

My book did arrive in yesterday's mail and I'm off to try some other FMQ ideas.

Same thing as above, but with more paisley fillers.  This was also the point in the practice where I ran out of the yellow variegated thread that I was trying to use up from the stash.  Unfortunately, there's little yellow thread in the stash so I was off to the store.

I figured that if thread wasn't on sale at JoAnne's, I at least had a couple 50% off coupons.  Guterman was 40% off, but selections had already been picked through for what I wanted.  Shockingly, the cut counter was NOT swamped and calicos were 50% off, so I stocked up on yellows.

Yes, I know I'm on a fabric diet.  But I've been working so diligently on the FMQ practice panels that I'm nearly out of stash yellow, which is what is the back of each panel.

I've been grabbing panels to practice on that are from throughout the finished quilt that I have planned.  My hope is that it will help spread out different techniques as well as what I hope is progress in my technique.  But I did want to see if my joining technique was going to work, so here are panels 1,2,&3 joined.

The overall design for this practice quilt came to me 2 years ago.  You can read about it at this post if you're interested. 


Friday, December 20, 2013

FMQ Feathers

I have issues with feathers.

My issue is that I don't like traditional feathers.

So I don't make them.

Therefore, when I think I might want to make some, I have no experience and they look like $#@&.

I spent some time trying to work out the flow.

There was A LOT  of erasing while I tried to sort out how to shift directions.


I did the first practice pass with an orange pen, trying to get into a rhythm.  I figured out that my groove is top to bottom and left to right.

It helps me to identify the spot on the inside curve where I need a "circle" to wrap the opposite direction feathers around.

For the next pass, I used a green pen and tried to focus only on the "spine" and focused on where things connected, letting the outer part flow on it's own.

I tried marking the spine of my practice block with a wash away marker but it wasn't noticeable on the dark green, so I used a yellow pencil on that side.

My final outcome was this.

When I was stitching it, everything felt smooth and amazing.  I tried to focus on ending the feathers in the same location to make heart shapes.

On close inspection, 30% of those feathers are still a little wonky.  And my effort to make a "stem" spine on the right just simply looks bad.

Oh well.

Progress.

Monday, October 14, 2013

Skirt Cont...

I do believe that I left off having finished this panel and debating about background fill.

The comments left about stippling detracting from the design reminded me of this practice piece I had done.  It did, indeed, detract from the central design.

I problem that I resolved by keeping the background fill linear.

So I decided to try that on the skirt panels.  I did switch to a grey thread and a walking foot.

To bypass the marking issues, I tried using freezer paper templates.

Didn't really work.

I would be outlining nicely, then the paper would become un-fuzed and I was either running the foot under the paper, or it would randomly run over one of the pointy tips.

The result was 2 side panels that look more like cousins than twins.

After a hot wash and dry, they have some nice texture to them.
Since I don't hate them at this point, I shall continue on.  I've managed to make the whole project more difficult by adding a pocket detail that wasn't in the original skirt, a separating zipper, and a new waist detail.  I am absolutely certain that my plans exceed my abilities.   Stay tuned.

Saturday, October 5, 2013

Skirt Update

I do have some progress to show, but it was not without it's challenges.  

After daydreaming about this project all week, I woke up Saturday morning jazzed (chuffed...psyched...) to get started.

I had decided that plastic templates would be the way to go since I would be making 2-4 repeats of most of these designs.

I was so careful to cut them out just inside the tracing lines so I would have accurate templates.

But then I hit a point when I realized that my FMQ is so if-y that it was unlikely to follow those lines very well anyway.

As I was cutting them out I had a tragic realization.  I ALWAYS have yards of black Kona Cotton hanging around the house.  Um. Not today. $#^+!   I'm willing to shift gears, but soon realized that of the 1000 yards of fabric in my stash, I don't have a single piece over 2 yards in a color that A) I will wear B) I can imagine in this design.  And JoAnne's Fabric on Saturday morning is worse than a root-canal with no medication.
After a brief period of panic, I decided that Hancock Fabric might be less painful.

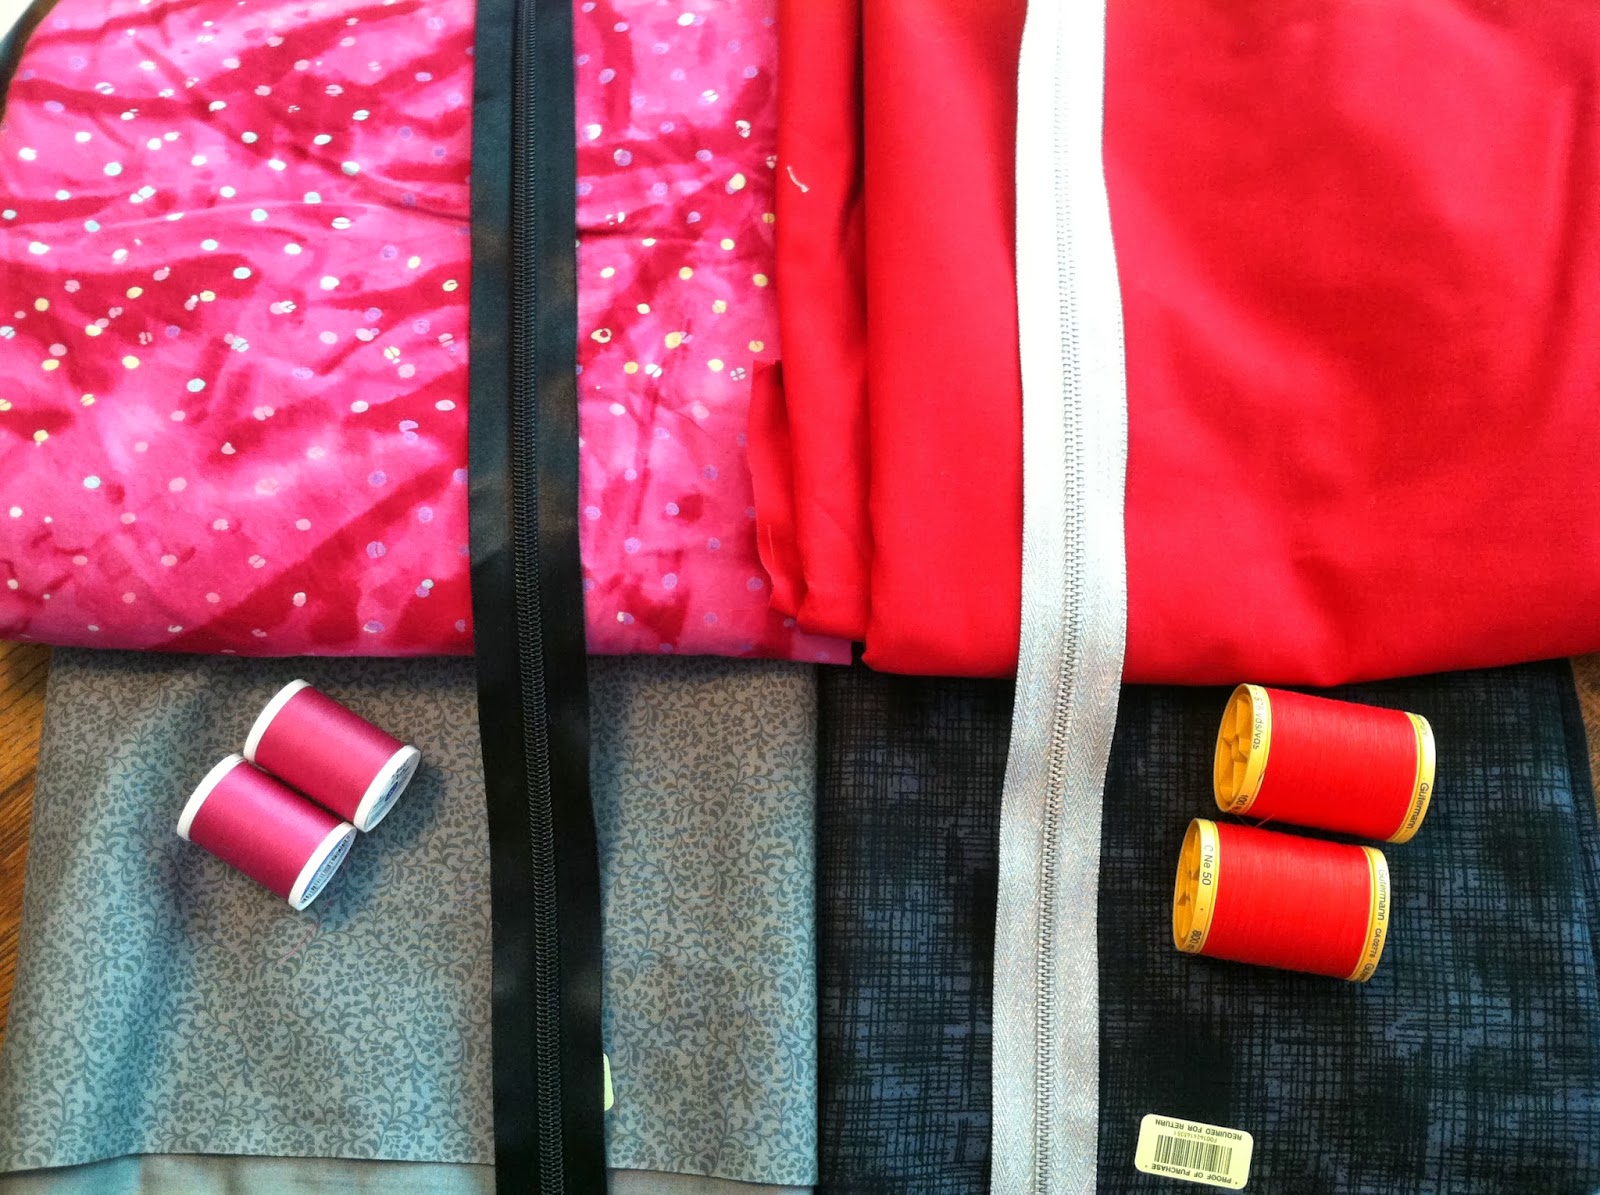
Turns out that I was right.  Quilting cottons 50% off.  As were zippers and Coats & Clark thread.
Instead of a stash buster project, I added 6 yards for this project and 9 yards of white-on-white - my standard quilting background. HOWEVER, I am using stash fabric and batting.  (And if I make it to the red/black version, stash thread.)


And then there was the Marking Saga.  I don't mean to be a drama queen...but really?  I can't find anything that really works on a mid to dark fabric.  I had an insanely expensive white Clover marking pen that I am totally hoping I can find the receipt so I can return it.  I bought it last week for this project thinking I'd be marking on black, and it was an absolute piece of crap.

I pulled out the water soluble blue marker thinking it would work.

Kind of did as long as I had full day light, overhead light, desk lamp, focused LED lamp and the machine light.  And reading glasses.  Double normal strength.

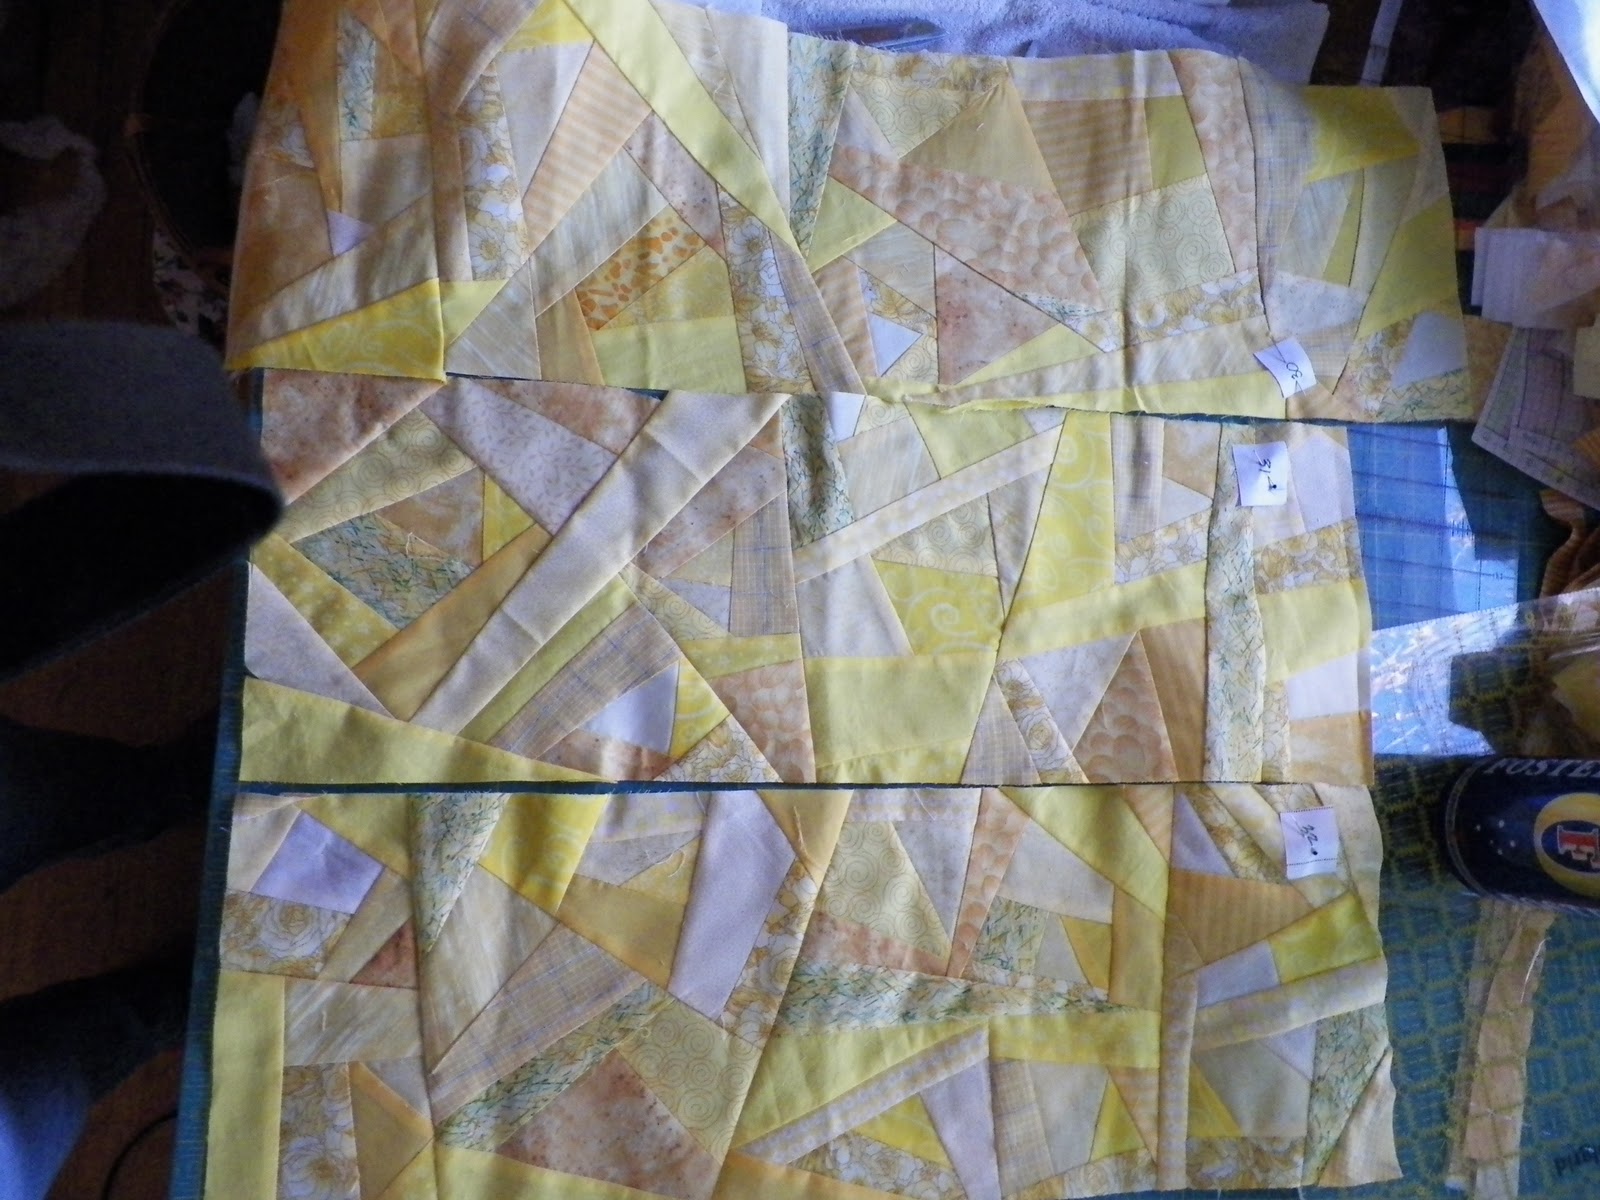
Here is the center front panel of my new skirt.  Since this is a major experiment I am also playing with thread.  I am using a Sulky embroidery thread on the top (with and embroidery needle), and the Coats & Clark on the bobbin.   [this panel has whatever was already on the fuschia bobbin...but the rest will be C&C.]

I did outline stitching on this panel so I can wash them all and get the shrink and texture that I want before I cut out and attach the panels.  I am using Bamboo batting (stash).

My current quilting dilemma is background.  I am thinking that I need to add some sort of stippling so the design will stand out.

So, anyway, welcome to my new 3-D quilt project.

Monday, February 27, 2012

QOV Finish

The Quilts of Valor project made by The Quilt Block Ladies is finally finished.

I'm pleased with the end result and learned several things by using a new (to me) quilt as you go technique.
1.  The stitch-and-flip technique to piece and quilt at the same time was quick and satisfying.
2.  The blocks that I made using the regular foot did cup somewhat compared to those made with the walking foot, but it's not noticeable in the final product.
3.  I should have checked the backs of my pieces when cutting and putting them together - I had about 6 sections where the batting was showing (1/8") and I had to do some hand darning to fix.
4.  I forgot to mention in the joining of the blocks post, that I did trim the blocks after they were joined to keep everything square.  The top stitching flattened the batting and not trimming would have created volcano-shaped bulges.

5.  The binding strips that joined the blocks helped to disguise that the diagonal strips weren't always perfectly centered or had slight variations in width (an artifact of having them sewn by 12 different people on different machines.)

6.  No matter how hard I tried, I never seemed to get the blocks absolutely lined up.

7.  The top stitching technique looks great on the front, but leaves some random looking seams on the back.  Although I'd like a "cleaner" look on the back,  it took only 2 days to join and bind 42 blocks this way, compared to 3 days for 20 squares on my yellow string quilt using the hand stitch option.

I've also been working on the handquilting for the Double Wedding Ring.  After much debate and many suggestions, I decided to add only one more round of stitching on the center.  It's about 5/8" from the other.

I really like the way that hand-stitched lines that far apart create a nice texture when they are washed.  Hopefully the bamboo batting will behave like I'm hoping (it's only my second time using it).

Monday, February 20, 2012

Joining Prequilted Panels

As the "A Team" used to say...I love it when a plan comes together.  

The Quilt Block Ladies came to our February meeting with over 20 more finished blocks.  I used the returned scraps and strips to finish up for a total of 42 blocks.

Leah Day recently posted a video tutorial of the technique that I used to put together the yellow string quilt that I made like this.


I made one change to this standard approach and I am very pleased with the results!  Basically, I did it backwards.  I cut the 1" wide strip of the backing fabric.

And I cut the 1.5" strip of the front binding fabric and pressed it in half, wrong sides together.  The light blue backing strip and dark blue binding strip are sewn on to the square at the same time.

Then the second block is attached to the other raw edge of the light blue backing strip.

The blocks then butt together with the two 1/4" seam allowances filling the 1/2" binding strip piece.  In the traditional approach this folded edge piece would be on the back and be hand stitched into place.

But instead, I top-stitched this in place right on the edge.

Then I top-stitched the other side of the binding piece also.

The top stitching looks nice and tidy on the top, and the back doesn't look too bad.

Now I'm joining pairs, then making 4 square sections then finally into 3 long strips for the final joining.


Saturday, January 7, 2012

Shower Epiphany

I always get the most amazing ideas in the shower.  It must be the timing of when the subliminal stuff from my dreams hits the morning caffeine.  Friday morning I solved 3 quilting dilemmas at once.

I had designed a fall themed quilt for my friend Carol.

The idea was to make the gold, orange and red as long strips of crazy patch with solid greens between.

I had finished about 30 inches worth of crazy patch before I decided that I wasn't loving the idea.

Last night I drew out the design that popped into my head in the shower,  and today started cutting out fabrics.  The idea is to make the stripes in smaller sections (typically 8-12 x 12-16 inches) and use those blocks for my FMQ Challenge blocks (project solution 1). I need more than 12 since I also want to try Trapunto this year and I want to try some designs to use on my Ojibwe Beadwork Inspired quilt which is waiting for me to become good at FMQ before I attempt to quilt it (project solution 2).

 By lunch time I had managed to cut out all the gold and yellow sections that will go into the quilt.  After I got those sections cut to size, I had enough yellow fabric to use on those stripes on the back of the quilt too.   I had another idea for the extra fabric....

...but first, I needed to finish 2 sections of yellow crazy 8x24, which I accomplished by early afternoon.

Meanwhile, I've been admiring string quilts on line.  And I absolutely loved the yellow zig-zag quilt that I made for my sister-in-law.  So all that gold fabric I had left over seemed a perfect candidate for a yellow & white string quilt.  Plus I could do a quilt-as-you-go method AND use up the bin of poly batting that I just found in the garage (project 3...maybe 4 & 5 too if using up terrible batting counts as a project as does learning an new QAYG technique).   I found a great QAYG technique tutorial at Welsh Quilter that I will use for both the string and the FMQ project.

Technically, these projects also solve quilting dillema 4 (or is that 6?), which was that I bought the green, red and gold fabric originally to do a Baltimore Album Quilt.  I've been collecting fabric for that quilt for so long though, that I'm now disappointed in the quality of many of the fabrics I collected.  This can be my excuse for only making pillows rather than a full Baltimore Album quilt.

I need to get all that done, because I've been taunting my brother Rick that since he was retired, he could send me a bunch of his old and/or ugly silk ties.  They arrived this week.  These are the ones that I think I can manage to play nicely together.

I'm still deciding on a pattern.  I'm planning to stabilize with a lightweight fuseable.  I'm psyching up to pre-wash so it won't have to eternally be dry cleaned.


OK...back to the sewing machine.  No, wait, football and hand quilting.