Thursday, March 24, 2011

Wooo Hoooo!

I was just released from jury service which means that my Spring Break Stay-cation starts a day early!

I've finished the vines for Love Entwined and am ready for some leaves & flowers.  Although I used bias strips for most of the vines, the bottom vine that forks into 3 for the flowers, I did as back basting rather than fuss with all the short stems.

Bright and early Friday morning, "Momsicles Popsicles" gets pulled out of it's hiding place and is my sole purpose in life for the next 3 days.  This is one of those projects that ends up spread across 3 rooms while I work on it, and requires a chunk of time without distractions in order to make progress.

I actually have a good bit of that orange popsicle pieced (after I took this photo), so my progress should look impressive.


Check out Terrece Beesley's website!  She's the artist who gave me permission to reproduce this great watercolor painting!  Her prints (as well as the original Momsicles Popsicles) are available at this link.

I hope to be able to make some daily progress posts over the next week!  Hope y'all don't get too tired of me!

Tuesday, March 22, 2011

Heart's Desire - Bias strips

Esther has launched both the Sing Me a Song block, and Love Entwined.    I decided to start with Love Entwined, since there are 3 needed...and I get bored doing the same thing over.

I used a different technique than what others are talking about on the Yahoo Group.  The way I learned to do bias strips is a bit different.  I made 1.25" bias strips for the wider circle (finishing at 3/8") and 1" bias for the narrow stems (finishing at 1/4").
Press in half with raw edges matching on one side, and right sides out.

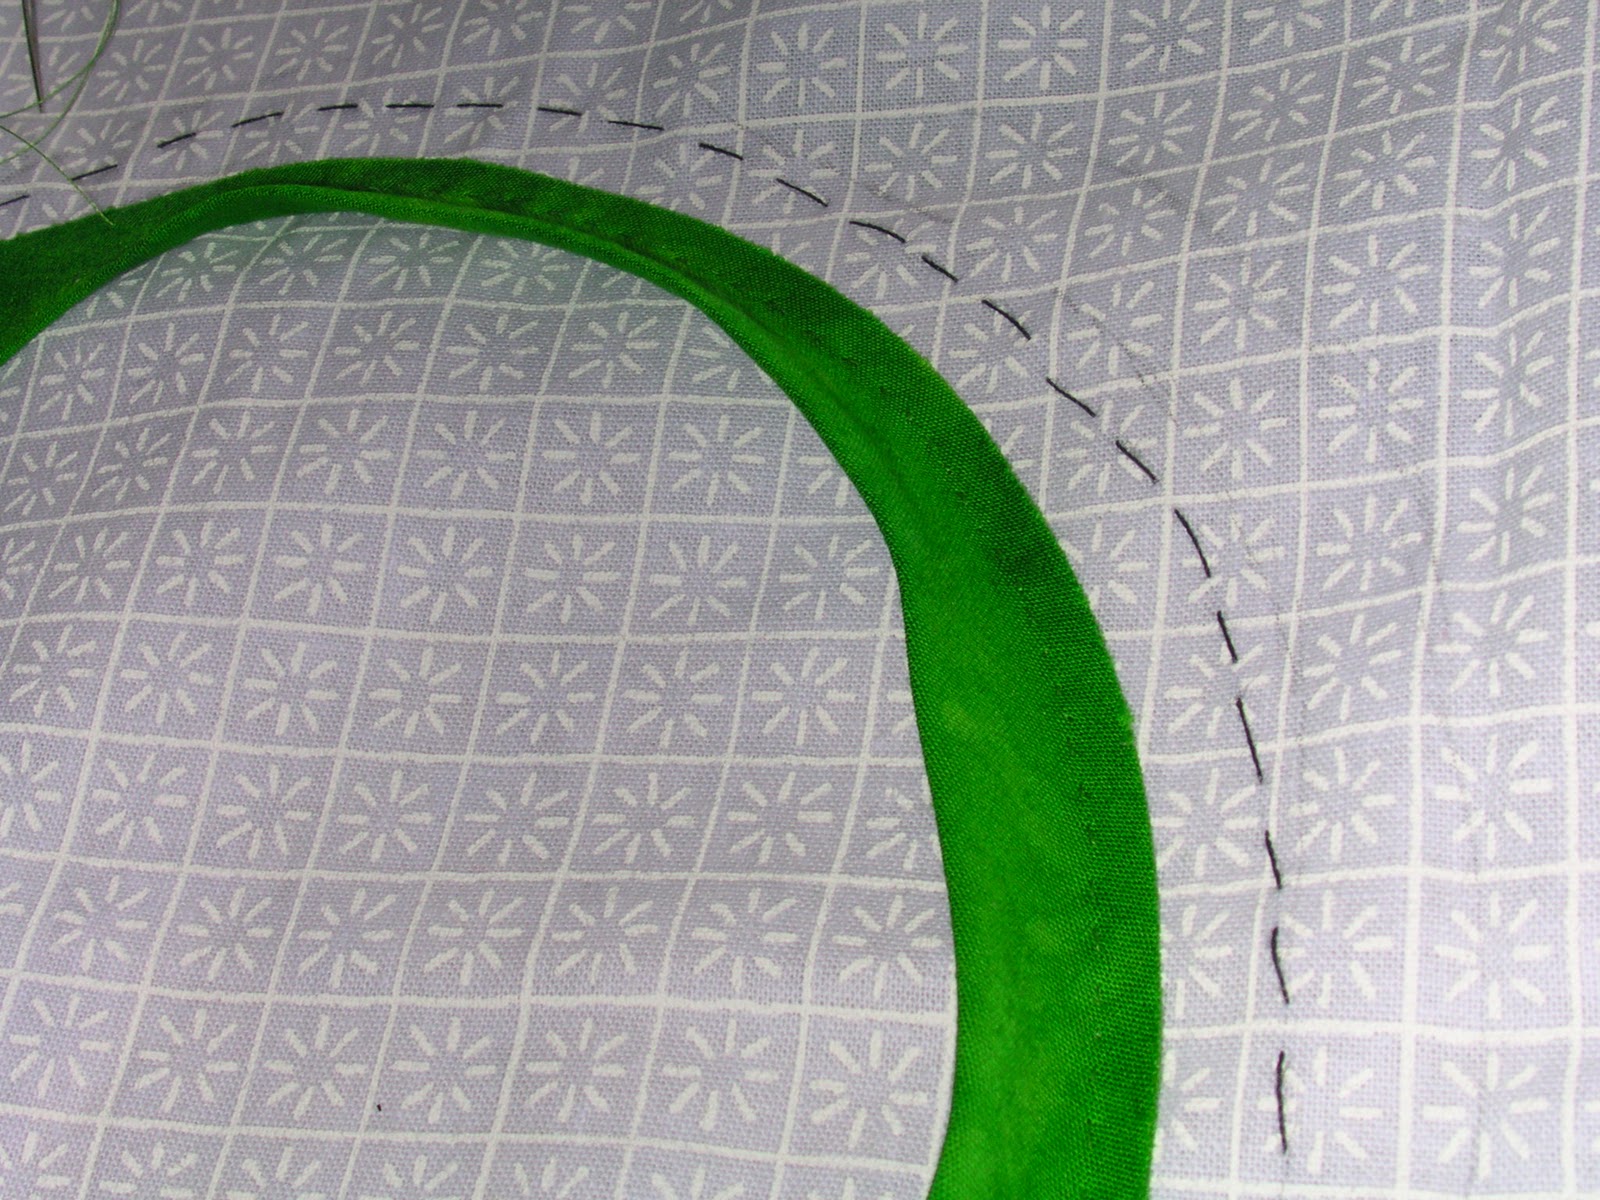
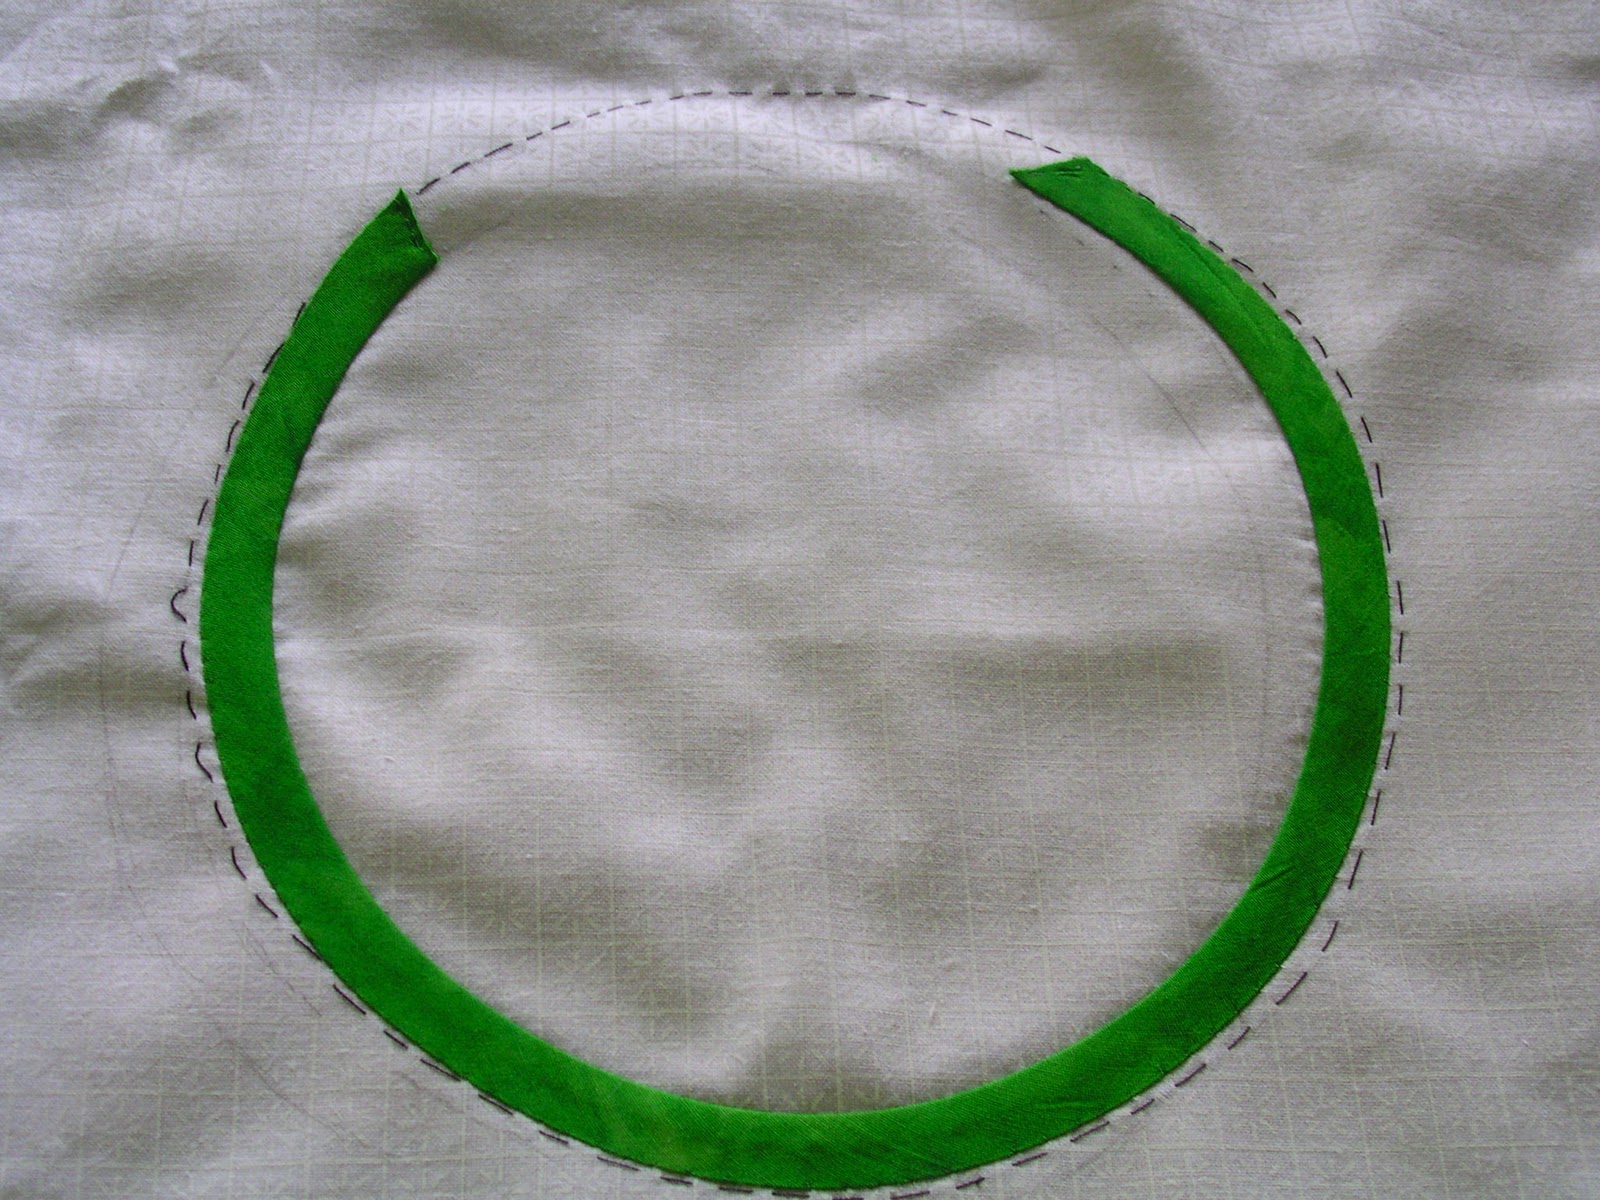
  Since my original plan was to use back basting, I had drawn the design on the back side of the background fabric.  I basted the OUTSIDE line of the curve in black. (If you marked on the front side, just use your drawing line as a guide)   Then I stitched the bias strip an 1/8" from the raw edges on the inside curve.

I just eye-balled it so my stitching line is 1/2 way between the upper-curve-basting-line (which may be your drawn line)  and the folded edge of my bias strip.  Make sure this side of the bias isn't pulled tightly or you'll get a lot of puckering on the background fabric.

Flip the bias strip out and stitch down on the outside curve.  Since I'm using scraps, I had short pieces of bias.  I sewed the ends down and and trimmed them at a location that will be covered by another stem.

Since there's a mix of "over" and "under stems, I did my best to work from the background out.  This stem used the same process as the circle.

After the "outer" curve was stitched, I trimmed the right side of the stem to 1/2 distance it'll be under the dark circle stem.  I snipped a couple of the stitches on the inner curve, tucked the stem in and stitched the circle back in place.

I hope to finish the stems tonight and move on to leaves tomorrow.

Wednesday, March 16, 2011

New Fabric

I've been very good for a very long time.  But today I broke down and bought these wonderful fabrics for a certain calico cat.  Brownish-black for the branches, 4 greens for the leaves, the dotted black & selection of oranges for the cat.  A little fabric therapy :)
I'm also feeling quite smug about my blind color matching.  The fabrics on the left are what I bought on my way home from work to match the fabric on the right that I just pulled out of a box in the garage where I stashed it 6 months ago.

Tuesday, March 15, 2011

Color Test

W. C. Fields was right. Stupid Cat.
I had this great post with a series of photos that showed my dubious progress of selecting fabric, when Marley decided to walk on the keyboard and in a single paw swipe it was GONE.   The less brilliant version goes like this:

Cold, wet cat who hates to sit in your lap unless she's thinks you look warm and absorbent, helps herself to my lap.  I toss orange fabric on her for a color test.

Once the correct camera settings are established, the fabric looks too orange.
So I set about trying to take photos of her next to terra-cotta.  This is as good as it gets.  No modeling contract in her future.

So...Calico Cat Butlers....since I'm trying to use fabric from the stash....do I go with the orange (of which I don't think I have enough) or the terra-cotta that's under the paw?

Monday, March 14, 2011

Cat Planning

limb on a limb
I've been out of the blog loop for a while dealing with a double tragedy at our house.  My husband's best friend has gone missing while driving across the state (270 miles) on rural road to our town for a business meeting then to hang out with us.  While the searching was going on, my husband's cousin and his girlfriend died in a plane crash.  All 3 are from the small town of Rexburg, ID.  It certainly doesn't compare in scope to the tragedies in Japan, but is much more personally devastating and emotionally draining.

Last night when I was told to "step away from the computer" I was able to report that I was, in fact, surfing quilt-porn.  This is the term used at our house for blogs.  DH listens to Blah-Blah (talk radio). I spent some time graphing out the cat design for the Charley Harper Quilt Along and am currently looking at making a 64" x 64" quilt.  That'll make the cat's face about 8" across, with the tail 5.25" wide and arms 4.5" wide.

Saturday, March 5, 2011

Charley Harper Quilt Along

 
I can't wait!!!  Ethne at Flaming Stitches is hosting a challenge / quilt along to use one of Charley Harper's images in a quilt.  I'm in love with this one:
limb on a limb
Check out the blog and join us!

Wednesday, March 2, 2011

Back Basting Applique - Insides, Outsides & Other Fussy Stitching

I've had some requests to do a tutorial on inside and outside corners.  I don't have anything currently in process, so here are some pictures from the archive. (When will I ever learn to get a manicure BEFORE taking pictures of my hands? Sheesh!)

OUTSIDE POINTS
Stitch up to 1/4" on one side of the point.  The spot where you stop stitching will be the tip your point.  Make a couple extra stitches in place, or close together here.  Trim off any "dog ears" to reduce bulk.

Put your needle into the point of the fabric.

With a sweeping motion, tuck that point all the way back to the stitched section.  Hold it in place with your  thumb.

Use your needle to tuck the seam allowance under on the left side of the point.  Like any seam using needle turn, just use the tip of your needle to stuff under any extra, pull a little out, or to get the fabric underneath to lay flat.  When you're done fussing, make several stitches close together on the left side of the point then continue on stitching the piece.


INSIDE CORNERS

Make a snip as long as your seam allowance (1/8" if you usually tuck under 1/8", 5mm for 5mm, etc), and and evenly splitting the angle your are turning.  In this example it's a 90 degree angle so it'll be a 45 degree snip.  You may need to make this snip a bit longer, but it's easier to do that than regret you went too deep.  Normally, I wait to snip until I've stitched up to  an inch from the inside point.

I was missing photos of the next steps, so here's a mock up using contrasting thread.  You can see in this photo that the snip wasn't long enough because instead of being a 45 degree angle, it turns up at the corner.
But by making the snip just a LITTLE longer, the edge stays nice and straight to the corner.  As I approach the corner, I make my stitches closer together, then 2-3 right at the inside angle.

Then just turn the corner, flip the seam allowance under, using your needle to fuss with the fabric to make the angle look straight.  Then stitch away from the corner.


For a tight outside curve, I use the needle to turn under the entire curve before stitching anything. My thumb holds the fabric in place while I tuck and pull a tiny bit at a time until I'm happy with the smoothness of the curve.  (Aren't opposable thumbs a grand invention?)

Let me know if things aren't clear and I'll edit accordingly.