Monday, January 27, 2014

21 and 22 Finished

Not only did I finish a quilt, I made 2 Cat Mats from the leftovers AND delivered them to their new home.  Here they are in their new habitat.

After I finished the strip piecing for the quilt, I found I had all kinds of fussy cut bits, some of which were already sewn into sets to make mirror image designs.  The cat of that house is madly in love with the last quilt I made for the couple.  I made kitty her own quilt.  This one had a double thickness of wool batting.

I had more scraps than would fit in one mini quilt, so I made 2.  I figured that if the cats don't like them, the couple does have twin baby girls and they can each have a dolly blanket.

They were really just an excuse for me to keep practicing FMQ.

And I delivered it along with a vanilla latte.  Because that's what friends do. 


Tuesday, January 21, 2014

#21 Flimsy Done

Roughly 70" square.  Will stitch in the ditch. 


WIP 21

I really was on my way to make a backing for the red & white bonus quilt, when I stumbled over this pile of scraps.

In 2009 I designed and made the quilt below to resemble a Persian Rug.  Since I was designing as I went along, and the theme switched from dark to light at the recipient's request part way through, I had a lot of fabric.  It is not a color way I use.  I gave the scraps to a friend.  They came back a couple years later.  A couple weeks ago, I was at another friend's new house which has deep red walls and a brown couch in the family room.  Ah Ha!

I spent the morning cutting the bigger scraps into 1.5", 2" and 2.5" strips.  A task made more challenging by the fact that I had fussy cut designs from most of them so the scraps look like swiss cheese.  I sewed them into 3 long strips and started joining them, alternating widths.  I have 3 panels that I am working on and have about 57" worth (70" wide) joined.  I hope to get to around 70" or more long... or whenever I run out of strips. 

I would have made more progress, but I was using my Viking, which an amazing repairman in Utah had brought back from the dead.  I was warned that it would no longer do 1/2 speed, which is fine since I don't use that feature.  It seemed though, that it was sewing slower than usual.  Kind of Southern.  After several hours of being annoyed, I finally checked the cord connections and suddenly had full speed again.  Doh!

Monday, January 20, 2014

Practice, Practice, Practice

First of all, I would like to rescind previous derogatory comments about feathers in general as I am starting to find some variations which I am quite keen about.  This border from Judi Madsen is one of them.  The double circle (mine look like olives rather than circles, but that's another story) make for very smoothly flowing pebble fill.  I struggled a little on the feathers as this design requires making all the feathers in the same direction (i.e. top of the spine down) instead of alternate directions like most feathers (i.e. down on the left, up on the right).   I know that sounds like a silly difference but it really made a difference as I had to really, really think rather than just flow.  I am also working on a domestic machine so seeing where I'm going around the foot is different than with a long arm.  The little triangle spine is brilliant as it fills in any wonkiness of the feathers.  And clearly I am better at making triangles than swirls.

The other variation of Judi's design was this one.  Hers is a fill for a square which I adapted to fit this panel project.  It looks great from the front (red side).  My less than perfect swirls are evident on the contrasting yellow back.

I have to remember that washing this when I'm done will make is so all the imperfections just make for interesting texture.

That's my story.  I'm sticking with it.

More fills just for practice. These are bi-colored panels and the other half will be green.

I also tried some swirls inspired by LuAnn Kessi.  I'm undecided how I feel about them at this time.  I ran out of bobbin and went to bed rather then winding a new one.

I keep plugging away on the USA hand quilting.  Here it is from the back.  The nearer sections have the between the block fill done, which I will have to go back and do on the earlier blocks.   And here's a close up.  I'm maintaining a progress widgit on the right sidebar.  I'm now done with 33 of the 50 blocks.

Sunday, January 19, 2014

More Practice

I've been practicing new fills.  This is a swirl and feather inspired by  Judi Madsen.

My book did arrive in yesterday's mail and I'm off to try some other FMQ ideas.

Same thing as above, but with more paisley fillers.  This was also the point in the practice where I ran out of the yellow variegated thread that I was trying to use up from the stash.  Unfortunately, there's little yellow thread in the stash so I was off to the store.

I figured that if thread wasn't on sale at JoAnne's, I at least had a couple 50% off coupons.  Guterman was 40% off, but selections had already been picked through for what I wanted.  Shockingly, the cut counter was NOT swamped and calicos were 50% off, so I stocked up on yellows.

Yes, I know I'm on a fabric diet.  But I've been working so diligently on the FMQ practice panels that I'm nearly out of stash yellow, which is what is the back of each panel.

I've been grabbing panels to practice on that are from throughout the finished quilt that I have planned.  My hope is that it will help spread out different techniques as well as what I hope is progress in my technique.  But I did want to see if my joining technique was going to work, so here are panels 1,2,&3 joined.

The overall design for this practice quilt came to me 2 years ago.  You can read about it at this post if you're interested. 


Friday, January 17, 2014

Practice

I've been practicing a feather fill for squares that I saw on Kay Bell's blog, and decided to give it a try on fabric but my practice panel is a rectangle.  Could be worse.  Could be better.  Definitely organic.

One of my UFO's, waiting to be quilted is the Puce 'Treuse Goose (On Spruce).  I bought this fabric on a whim, just to make a quilt with that name.  (The backing has a pine branch fabric.)

After a couple doodling attempts on paper, I worked out this quilting design.  The feathers will be on the geese (ha ha ha)  with the connecting sections of v-shaped circles.

Note to self - don't like variegated thread for pebbles as it creates random weird bold circles.

And finally, in an attempt to like (and be good at) feathers, I've been trolling the internet looking for examples that I like.  Judi Madsen came to my rescue with this swirl and feather filler.   According to Amazon, my copy of her book Quilting Wide Open Spaces should be arriving today, so I may have some other practice pieces to share by the end of the weekend.

Monday, January 13, 2014

Decent Feathers

I had a weekend of small victories on the WIP front.

As for feathers...by jove, I think I've got it!  Two bits of advice that I picked up on line that helped are 1) making the feathers smaller  2) spend a lot of time drawing them on paper before going to the fabric.

I also discovered that the amount of fabric to hold on to makes a difference as well.  The outer edges of this practice panel are less impressive than this center section.

I have 27 state blocks quilted.

I had been doing a row or two of echo stitching on each block, but leaving the connecting bits to finish later.  I am now pretty comfortable with how the overall flow of the quilt is going to go and I've been adding the fill as I go.

I learned on my last quilt with wool batting that manipulating the distance between quilting  creates more textural difference than with cotton or bamboo batting.  I am using that to my advantage.

I finally got serious about organizing my HST project by arranging 10 red and 10 white squares in piles that I can grab and throw in my purse to work on anytime I have a spare moment.  I had a total panic moment when I discovered that I was nearly out of white-on-white fabric. (I buy it on sale in 6-10 yard pieces since I use it for everything.)  Fortunately, I found a couple big pieces that were in "project" boxes.  336 HST finished, 600 prepped.
   Speaking of which, I've managed to reorganize some project boxes.  I moved all the red batiks that I've been collecting for some undecided project in with about 1/2 the green batik fat quarters that were for a leaf motif quilt I haven't gotten around to designing.   When I found the rogue white-on-whites, I prepped 10 squares for the Benjamin Biggs quilt.   They are all living happily together in my circa 1969 Groovy Suitcase.

While I have successfully avoided buying any fabric for months, I have already spent $21 this week on needles.
The good news is that I finally found the perfect combination for quilting this quilt.

A traditional length quilting needle (on the right) is perfect for making 1-2 stitches at a time.  It needs to be very sharp since there are many seams go go through, not to mention the "paint" on the white background.  The coated Coats & Clark quilting thread I had in the stash is thicker than standard threads, so my solution is the Clover Black Gold size 10.

A sturdy applique needle (10 or 11 depending on the brand) is great for the long straight sections.  I can load 4-5 stitches on at a time, which keeps the lines significantly straighter.

Wednesday, January 8, 2014

WIP update 1-8-14

I continue to make slow, steady progress on hand quilting the USA quilt.

It's fun to remember things about these blocks as I do each one.  This is Corn & Beans for Iowa.  We pulled off the freeway in Elk Horn Iowa on a cross country road trip to find a quilt shop.  We opted for the scenic route past plenty of farm land to the next exit East, just for fun.

When I finish this block, I'll have 20 done.

I've put myself on a serious budget busting fabric diet this year.  The stash-busting I was working on last year, but buying nothing unless it's necessary to finish a WIP or UFO.

I wish I didn't have such expensive taste in needles.
$9!  Maybe this is offset by the fact I like $1 thimbles.

The black gold needles are so lovely for applique.  And since I added the Biggs BOM to my list of WIPs to round it out to an even 20, I might as well have nice tools.

The size 10 Bohin Applique needles are fantastic for making long joining stitches for these hand pieced blocks I continue to work on.

And the 4th WIP I worked on this week is practicing doodling feather as fill.  Next round of FMQ feathers that I try will be narrower than than the previous.

Sunday, January 5, 2014

Biggs Details

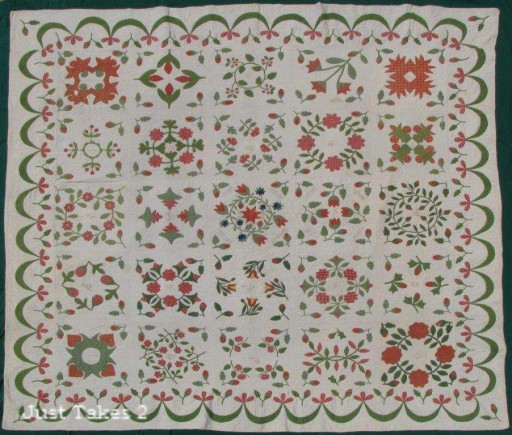
I am finished with the Apple Pie Ridge Star block, First of the Benjamin Biggs BOM.  

I kept thinking that the shape looked familiar and finally decided that it's the Idaho WIC logo.

Not bad symbolism actually, as I was a WIC Dietitian for 10 years.   But if I were to do it over, I'd do a double scroll like the one from QuakerQuiltHistory.com.

The reason that I LOVE applique is the opportunity to do some really cool details, most of which are only known to me.

I fussy cut the swirls on the flower bud.  And lined up the center veining on both the bud and the leaf.

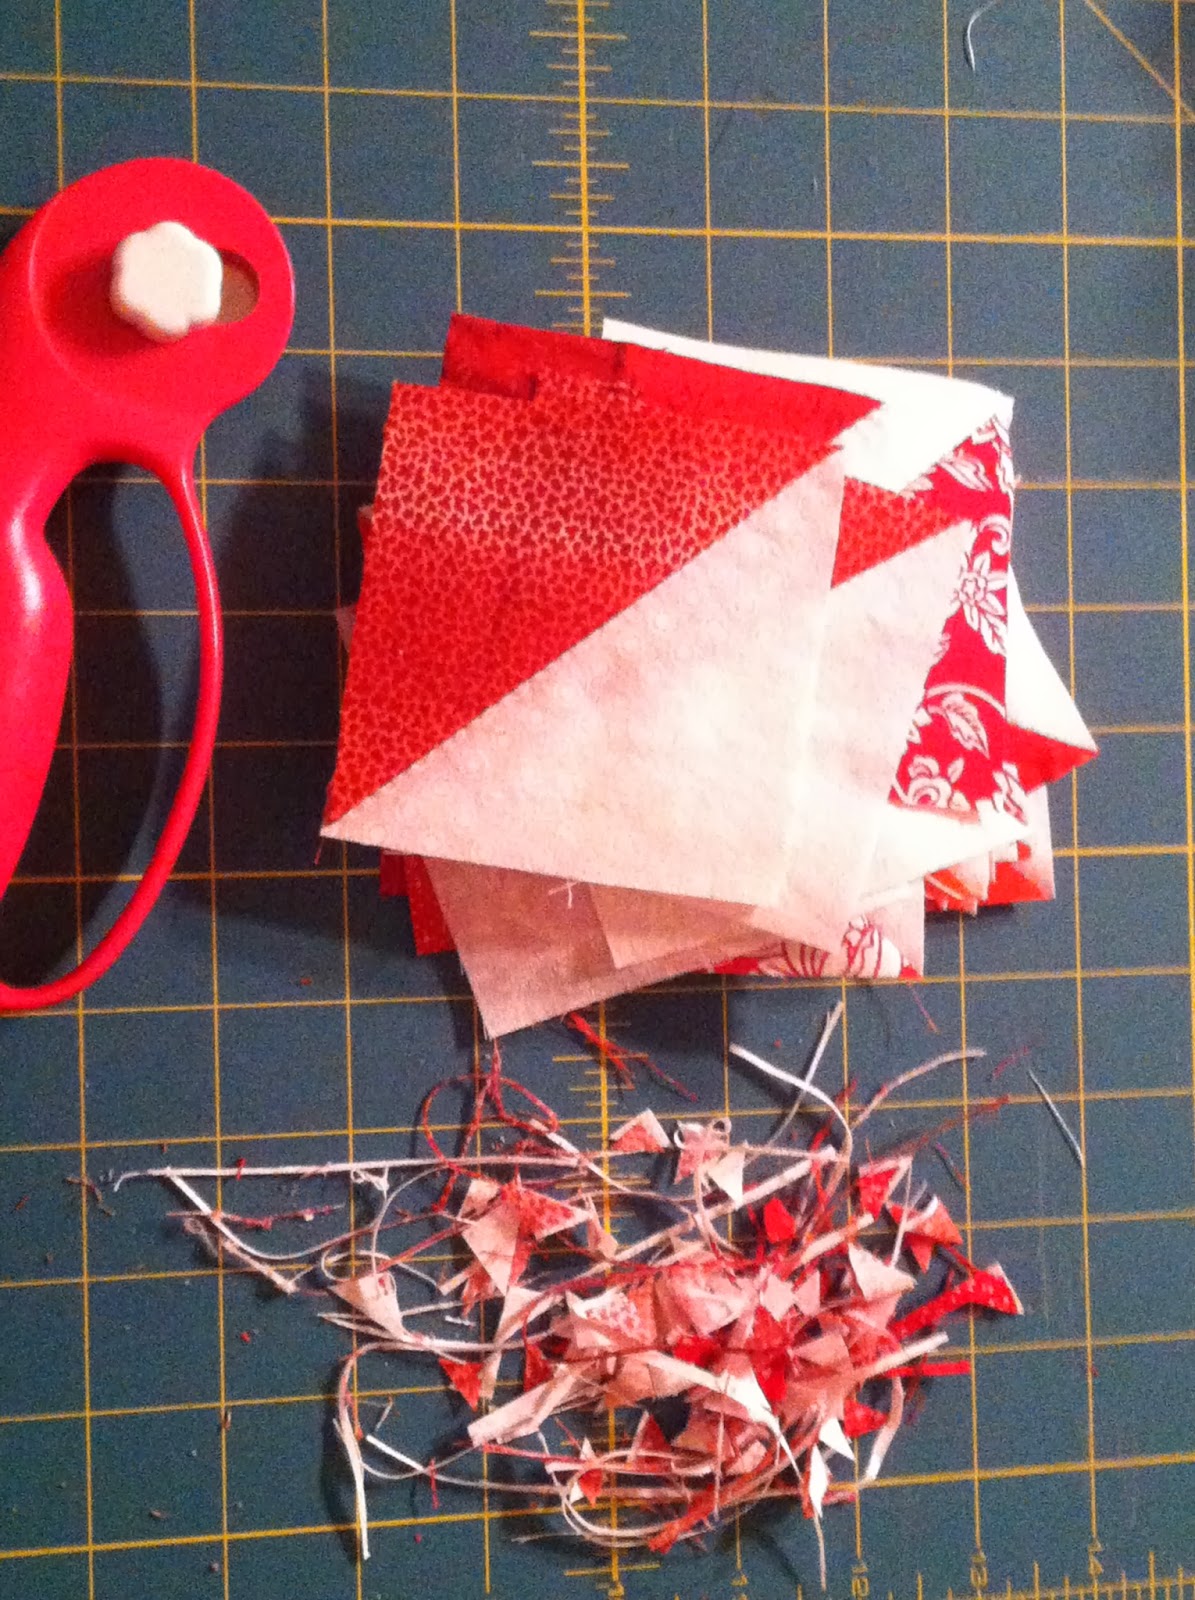
Here's my process for "fussy cutting" using Backbasting applique.

Use long pins to mark the center veining.  Also the top bottom, and for this shape, bottom of the bud.

By feeling through the fabric, you can position any center veining as well as other designs on your fabric.  I like using small applique pins to attach the fabric to the right side.

Use a contrasting thread to baste the fabric in place.  My general plan is that I can make longer stitches where it is long straight runs, and closer together for the curves and fussy bits.

Remove the basting an inch or so at a time,  and use needle turn techniques to sew the shape down.  I like silk thread and a size 11 or 12 needle.    Clover Black Gold is my favorite, but this is my last one, so I may need to take out a second mortgage to stock up.


Things don't always turn out like I planned.
I'm pretty laid back about letting things look organic...but square leaves are a deal breaker.  (I was busy watching the game and talking to my daughter and didn't notice how bad they were as I was making them. )

I rarely  make this kind of error when hand stitching, but it's not a hard fix.

I used a seam ripper to un-stitch the curves, leaving the inner points that were just fine.

Stitching better.  Though the photography is not.

My point is that sometimes a couple minutes is worth the fuss.

 I'm on my way over the the Benjamin Biggs Blog.  Join us over there if you're working on this quilt.  I'll be blogging both places but with different content.

Friday, January 3, 2014

Primary Source

I love the overall look of the new Biggs BOM that I've decided to do.  With the exception of block #1.  Which is probably not a good way to start a big project.  What I don't like is a combination of it's strange asymmetrical shape the the unknown purpose of the weird green commas.

There is a great history document that was provided with the block called Apple Pie Ridge Star.

Which triggered an Ah-Ha! moment in the shower this morning.  What if this was a bad interpretation of a great block?  Is this the Wikipedia Version of a great masterpiece?

My background as a college professor kicked in and I decided to look for a primary source.  Maybe this is like the "whisper game" where things change as they are passed on....

A quick internet search and I found several historic examples including my favorite variation from QuakerQuiltHistory.com

*Insert Sound of Angels Singing*

Now I'm getting excited!

I grabbed a pen and started reshaping the pattern.

Before my work day had started, I had a mock up.

This is worth stitching.

I do backbasting needleturn applique so I need to trace the design on the back of my fabric.    The thing that I hate about winter at 43 degrees North is that it's dark when I go to work and when I go home.  My "light box" (aka window) doesn't work.

I had already prepped the background block.
So I finished the prep at lunch at work.

I've never flashed a hospital with quilt patterns before.


* If you are not familiar with back basting applique, there are tutorial links on the top right sidebar of my blog.

Thursday, January 2, 2014

Progress and a Lie

I am slowly getting a feel for feathers.  Feeling bold enough to try some with yellow thread on dark green.  And I might be convinced to give variegated thread a second chance.  I kind of like it on these skinny doodly lines that I used for fill.

I looked at some Feather Quilt Porn on line and decided I needed to try adding some curly bits, but was cautious enough to do it on the yellow where it wouldn't show much if I didn't like it.  I ended up drawing out the feathers to follow on that side so both sides would come out similar.  I was feeling pretty bold and just drew the spines on the green and did freehand feathers.  Some of them are still coming out kind of square.  I need to work on that.

Now on to the lie.
A couple posts ago I said I wasn't going to start anything new until I'd cleared 10 things off the list.  You knew that wouldn't really happen, right?  Besides, 20 WIPs is a nice round number.

Just Takes 2

There just happens to be a free BOM that started today.  (Follow the link above to join in.)
It seems like the perfect excuse for using the red batik collection I've been hoarding for years.
It's been washed in Retayne and is in the drier as I type.
I considered my "usual" color palate of lime & fuschia, but think that maybe it's time for a really traditional applique.  I'm not really keen on all the blocks, but sometimes it's good to do something uncomfortable.  Hello Benjamin Biggs.