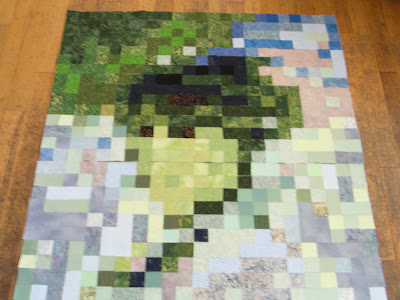
I'm feeling much better [cough]. Thanks for asking [sniffle, cough]. However, yesterday when I was confirming my Thursday schedule, I must have sounded like hell because my colleague offered to reschedule all my clients. So it's another day of quilting for me [hack, hack, cough, groan].
The Lady is shaping up nicely. I found some greens in the stash to replace the ones that were too blue. The missing pieces are all supposed to be the blue/tan fabric that's in the bottom 3 rows, but I don't have enough so I may substitute a similar fabric in the sky sections. (If I could remember where I bought it...I would buy more since I'm pretty sure I bought it at one of 6 quilt shops in the 20 mile radius.)
I'm going to start a list of lessons learned to share with anyone else who is crazy enough to try this...also to serve as notes to self if this turns out well enough I want to attempt another.
1. Before ordering fuseable interfacing, double check the number of squares per panel. (I mis-read the 24x24 inches as being 24x24 squares...they are actually 15x23 squares.)
2. The time spent counting up the total numbers you need of each of the colors is time well spent. For 1.5" squares 1/8 yard = 75, 1/4 yard = 150, 1/3 yard = 200.
3. I cut down sticky notes to 1/4" strips and wrote the numbers of the colors I needed. Those were then stuck to the color key so I knew which colors I was looking for. As soon as the fabric was cut, I pinned the number onto the fabric. When the sticky notes are all off the key...you have all the colors you need!
4. Be cautious about batiks. A color wash that has an overall blue feel to it may look purple or tan when cut down to 1.5".
5. Before cutting fabric, organize the stacks based on the names of the colors (i.e. Olive Lt, Dk, VyDk) and reorganize as needed.
6. Cut all your fabrics into the number of strips that you estimated that you'd need (1 strip = 25 1.5" squares). Cut some of them into 1,2 and 3 block sizes. The floss organizer works really well. When you are ready to use one color, pull out all the fabrics and the identifying label at once and replace them as a unit when your are done. Keep a small cutting board handy so you can cut more of the sizes you need from the full strips as needed.
7. Buy or borrow a mini-iron (mine is a Mini Iron II by Clover, purchased with a 40% off coupon at JoAnne's.)
8. A wool blanket folded in half has worked well as an ironing surface large enough for a panel.
9. Trim the edges off the pre-printed panels. Also, consider cutting panels into smaller pieces. I could easily reach across 10 squares, but when I used a full panel, I had to stand and hover to reach the top rows which caused my back to protest.
10. Work in a cat-proof space. (If you've ever worked on a jigsaw puzzle in a house with a curious cat...you know what I mean.)
11. Don't iron the pieces down until the whole panel is placed. (This morning I was 3 spaces off on the right 1/3 of the panel, ugh.) Tip #10 is critical to success on # 11.

2 comments:
Hi Marjorie,
What you are doing looks really interesting, I can't wait to see the outcome!
Thanks for your comment on my blog, your email came as no-reply, so this is the only way I could figure to contact you.
It seems that sometimes you are better off taking your own cup to classes, I haven't been to many classes lately but it appears to be the thing to do. Maybe then you can have a nice big cup of tea that will stay hotter for longer!
Cheers, Jess
Thanks for visiting my blog and no, I don't think it's "wrong" to look forward to the kids leaving home so you can take over "their" space with your sewing; quite the opposite... ;). And I've been following your blog as well, partly because of your Baltimore block you have on your blog and also because I'm a fellow applique addict. I'm interested to seeing how your current project is turning out. It looks very interesting! Happy Weekend. Vreni
Post a Comment